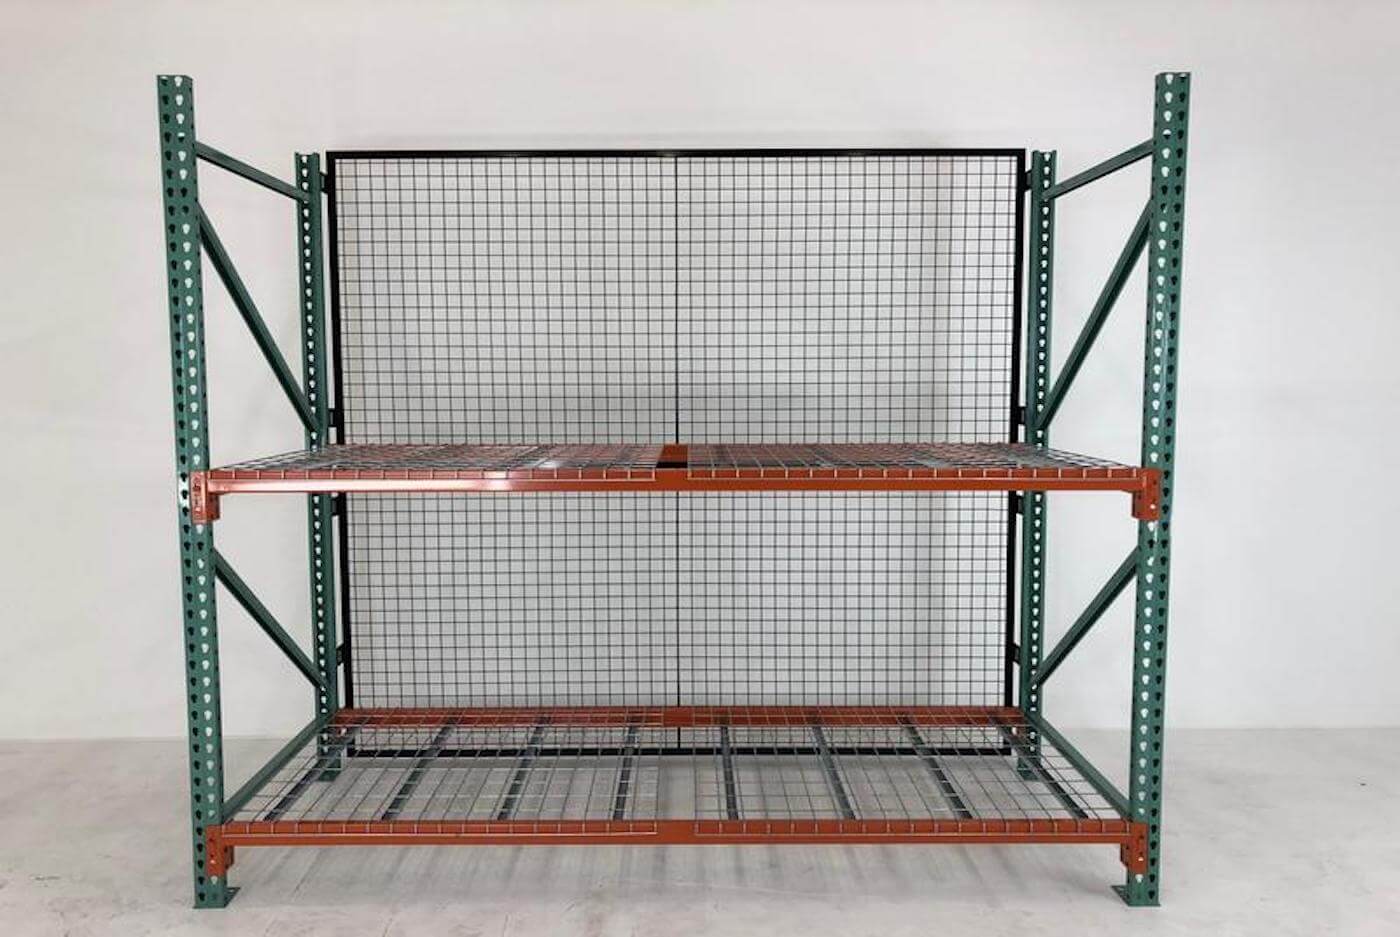
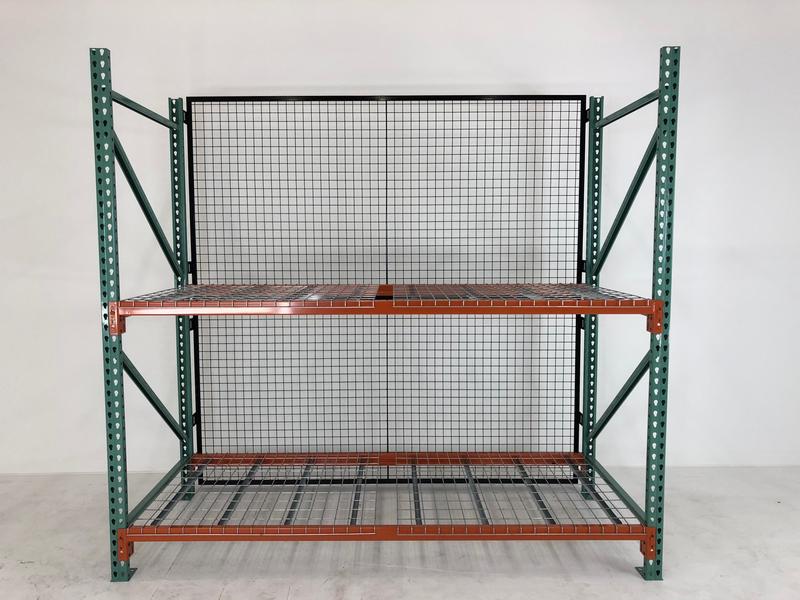
What is Rack Back?
Also knows as pallet rack backing, or rack back guard, rack back is a type of protective barrier that is installed directly onto a pallet rack to prevent items from falling and to keep them secure. Rack back consists of a wire mesh panel built onto a steel frame. Typically installed on the back of the pallet rack, thus the name “rack back”, this product can also be installed onto the sides of the racking system to create an enclosure with doors as an optional accessory. The wire mesh allows for increased visibility while providing heavy-duty protection. As opposed to industrial netting which is designed to catch fallen products, the rigidity of rack back prevents pallet loads from falling out in the first place.
Rack back panels are easy to install, which makes them a popular choice. The panels can be installed flush to the pallet rack or overhang. Rack back is used in many different industries including distribution centers and warehouses, as well as manufacturing facilities. They are a great way to keep your employees safe from falling products or pallets while keeping your products secure.
What are the Benefits of Installing Rack Back?
Rack back is an easy-to-use and effective product that provides many safety benefits.
-
Rack back is a great accident prevention method. It helps keep your employees and any visitors to your warehouse safe from falling inventory.
-
It makes it easier for employees to stack inventory, prevents products from getting crushed during the stacking process, and reduces the likelihood of products from getting pushed off.
-
It keeps your inventory safe by reducing access. Rack back can also be used to create a security enclosure to keep your products safe from theft.
-
It prevents spillage and keeps your warehouse more organized.
-
Helps meet National Fire Protection Association (NFPA) compliance requirements.
Determining the Needs of Your System
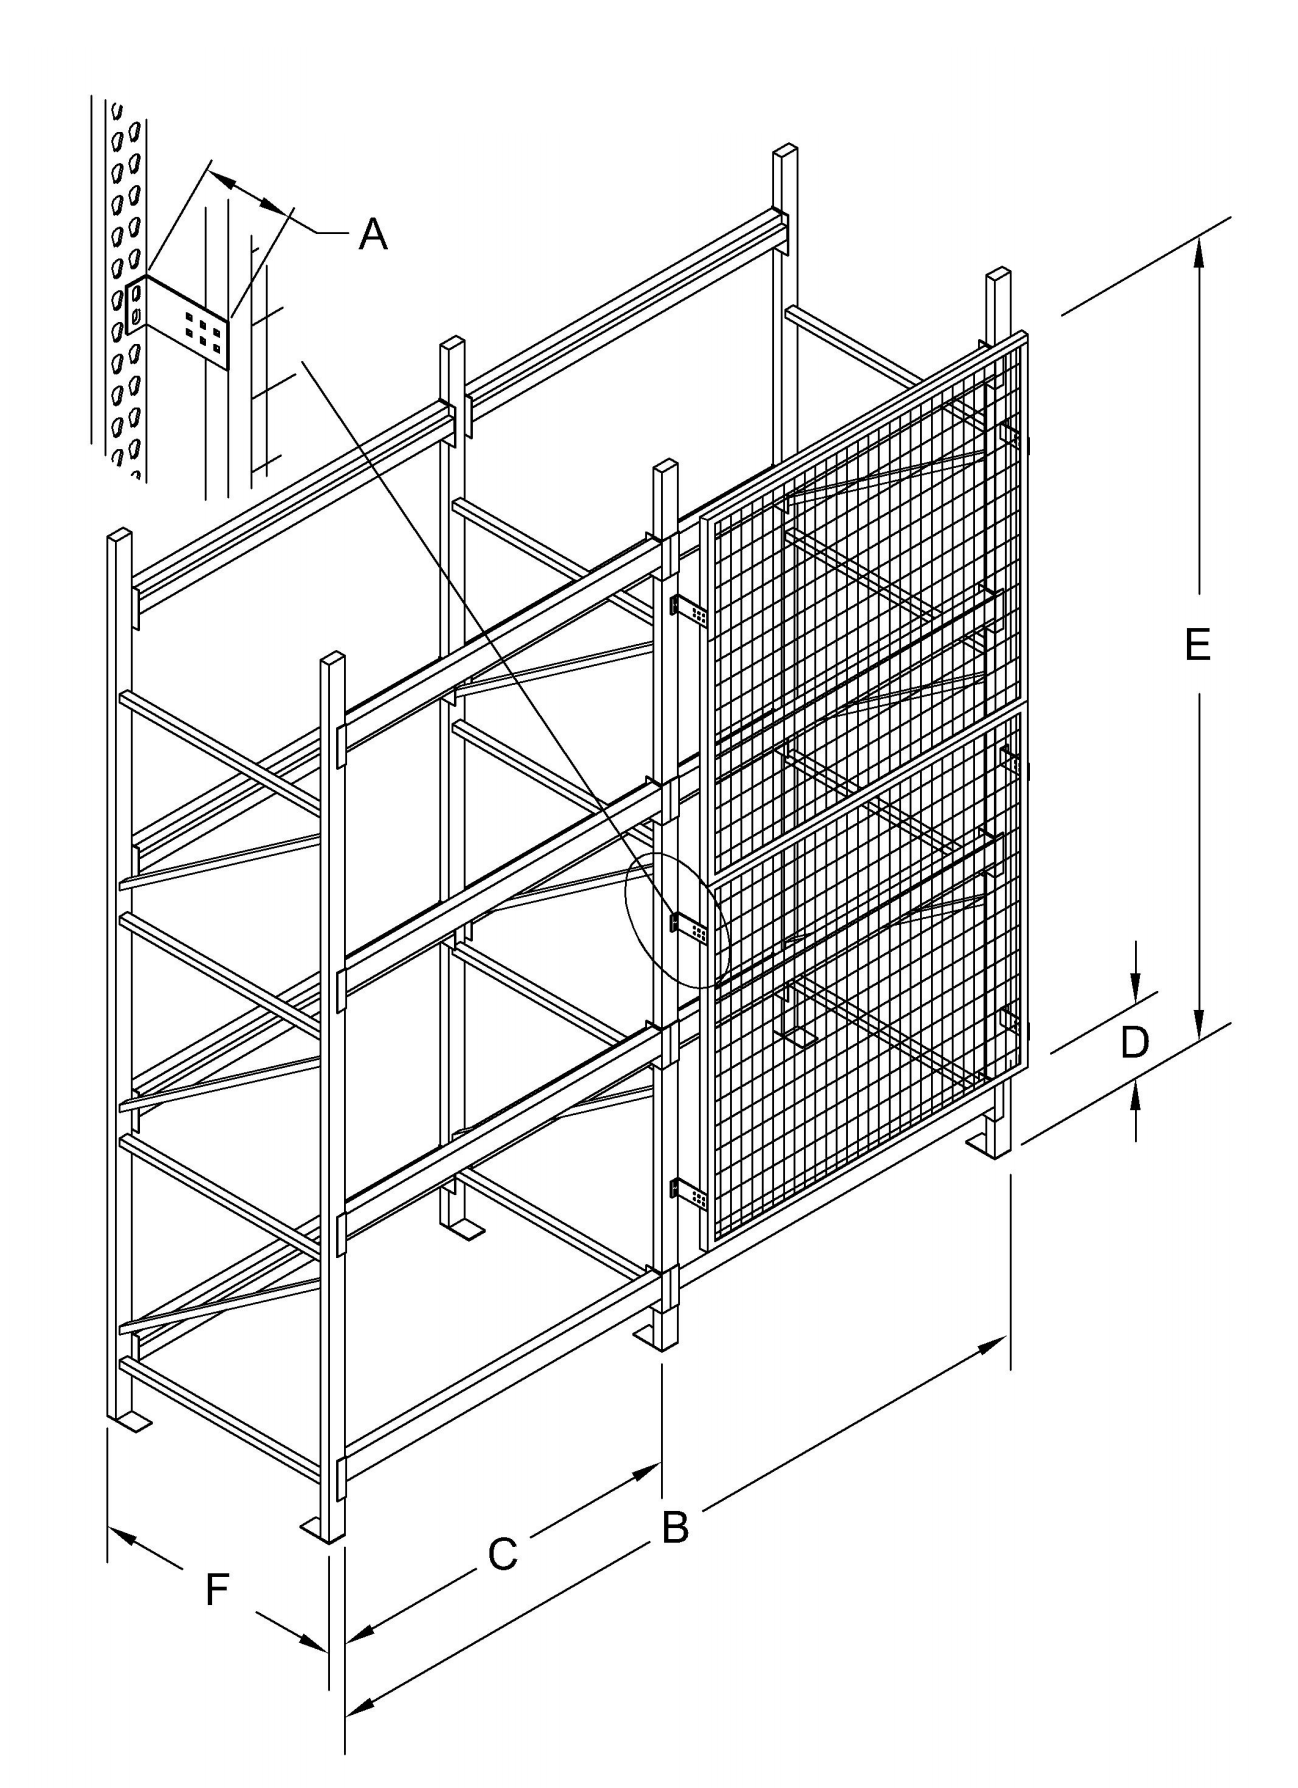
To determine the size and type of the rack back you need, you will need the following measurements and specifications:
-
Offset dimensions for overhang (if applicable)
-
Quantity of rows and quantity of bays per row; bays wider than 10’ require 2 panels adjoined with a 4’ splice channel bolted to the top and bottom panel.
-
Beam width of the pallet rack; this is the distance between the two uprights that you are installing the panel onto. This measurement will determine the width of the panel you need to order. Standard-sized panels are designed to match the inside dimension between uprights and have multiple holes punched to avoid mounting brackets at beam levels. If there are no standard size panels to match the width, you may join them side by side to match the required width
-
Height from the finished floor to bottom of the panel (if not flush to the floor)
-
The desired height of the panels; will the height of panels extend beyond uprights and by how much?
-
Depth of the pallet rack uprights
Rack Back Features and Accessories
Wire Gauge: The wire mesh on the panels comes as the standard #10 gauge, but can also be ordered as #6 gauge if a heavier duty wire mesh is needed. Both options are welded into a 2”x2” square mesh.
Panel Sizes: The standard panel sizes are in one-foot increments up to 5’ by 10’. They have pre-punched 1-¼” x ⅜” slotted holes every 12 inches on the center. Panels can also be attached to the row ends of the pallet rack to create side enclosures.
Doors: Rack back doors are an optional accessory to keep your products extra secure. They are installed directly onto the pallet rack uprights as a cost-effective means to avoid purchasing independent door posts. They come with padlock hasps to allow for locking. Doors are constructed similarly to the panels with the addition of steel stock welded diagonally for increased rigidity
Panel stiffener bar is used only on #10 gauge wire mesh materials and panels greater than 5’ long in any direction.
Splice channel is available for installations that require more than one panel per each bay. The channel is attached to the top and bottom of the panels. It is also used to connect top and side seams of door halves larger than 5’ by 10’.
Connection angle is used to connect panels to uprights when extending above uprights. Angle is provided in 7’ lengths and may require an erector to cut to size.
Brackets: Different types of brackets are available for your applications. These include flush mount, adjustable drop-in angle brackets, and universal brackets. Make sure to determine which type of bracket your system needs before placing an order.
Rack Back Installation
Things To Know Before Starting
It is recommended that rack back is installed by qualified and experienced personnel. Always review the manufacturer’s instructions and all of the diagrams before beginning the installation.
Before you get started, make sure to inspect all parts for damages. Do not proceed with the installation if any of the items appear damaged. Reference the packing list for the inventory of materials. Do not proceed with the installation if there are any missing items. Check your items for part numbers to double-check that all of the materials are there. If the part numbers do not match or if you notice missing parts, do not proceed with the installation.
Recommended Tools:
-
Crowbar, tin snips & utility knife
-
Tape measure & level
-
Ladder & extension cord
-
Saw with blade for cutting metal
-
Impact drive with SAE deep well sockets
-
Rubber mallet
Other Recommended Material:
-
Washers or other materials suitable for leveling/ spacing the system
Installation Steps
Rack back is installed directly onto the pallet rack uprights. There are two options for installation.
Option 1:
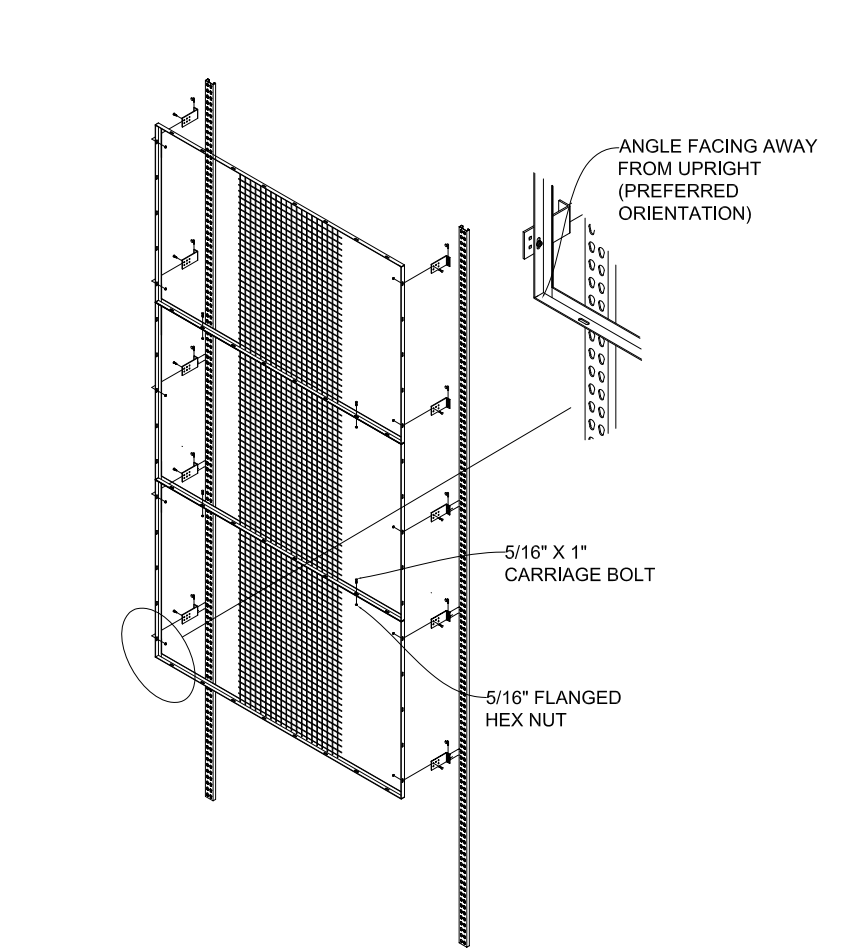
Step 1: Install the brackets directly to the rack back panel. Use a 5/16” carriage bolt and 5/16” flanged hex nut to install each bracket.
Step 2: Once the brackets are installed onto the panel, you can drop the bracket rivets into the teardrop pallet rack uprights.
Step 3: After the rivets are inserted insert the safety drop pin into the hole in bracket and upright.

Option 2:
Step 1: Drop the bracket rivets into teardrop uprights.
Step 2: After the rivets are inserted insert the safety drop pin into the hole in bracket and upright.
Step 3: Install rack back panel to the brackets by using a 5/16” carriage bolt and 5/16” flanged hex nut.

Connecting the Panels
The rack backs may also be connected to one another to stack or horizontally or vertically depending on your needs. Use 5/16” carriage bolts and 5/16” flanged hex nuts to connect the panels by aligning and joining the existing holes. A Splice channel can be used to connect the panels horizontally.
Stacked Installation:
Side-by-Side Installation:

Panel Extension
If the rack back panel extends beyond the height of the pallet rack upright, it is recommended to notch a perforated angle and bolt the angle to the side of the panel and to upright. Make sure to consult local building codes and check the manufacturer’s recommendations for more information.

Rack Door Installation
Step 1: Decide which door mounting holes to use by measuring your desired sweep space and avoiding horizontal rack beams.
Step 2: Mount bottom bracket a minimum of 1 ¾” above the finished floor
Step 3: Set door in the bottom bracket (use spacer block if available)
Step 4: Install top bracket leaving a minimum of ¼” of pintle rod showing between rod end face and pintle bracket.
Step 5: Install padlock hasps loosely until final door adjustment is made.
Step 6: Adjust the gap between doors by adjusting rod end nuts in or out.
Step 7: Tighten padlock hasp hardware.

Tips for Door Installation:
-
Set spacer block of desired sweep space below the door to set bracket heights.
-
Each door half mounted on outer rack uprights will require a left and a right bracket.
Where To Buy Rack Back Near You
At American Storage & Logistics, we have a large selection of pallet rack and accessories to fit your needs. If you are in the mid-Michigan area near Grand Rapids, Lansing, Kalamazoo, or Battle Creek, you can purchase your rack back products online and pick them up at our warehouse the same day, or get them delivered to your business as soon as tomorrow.
Explore our online inventory on our website or give us a call at 616-247-9800 to chat with one of our storage specialists and we can help you find the right system to fit your needs.